【Android】Android基于ibeacon信标实现蓝牙考勤功能,利用蓝牙信标做一款打卡软件,Android与服务器的蓝牙考勤系统
目录
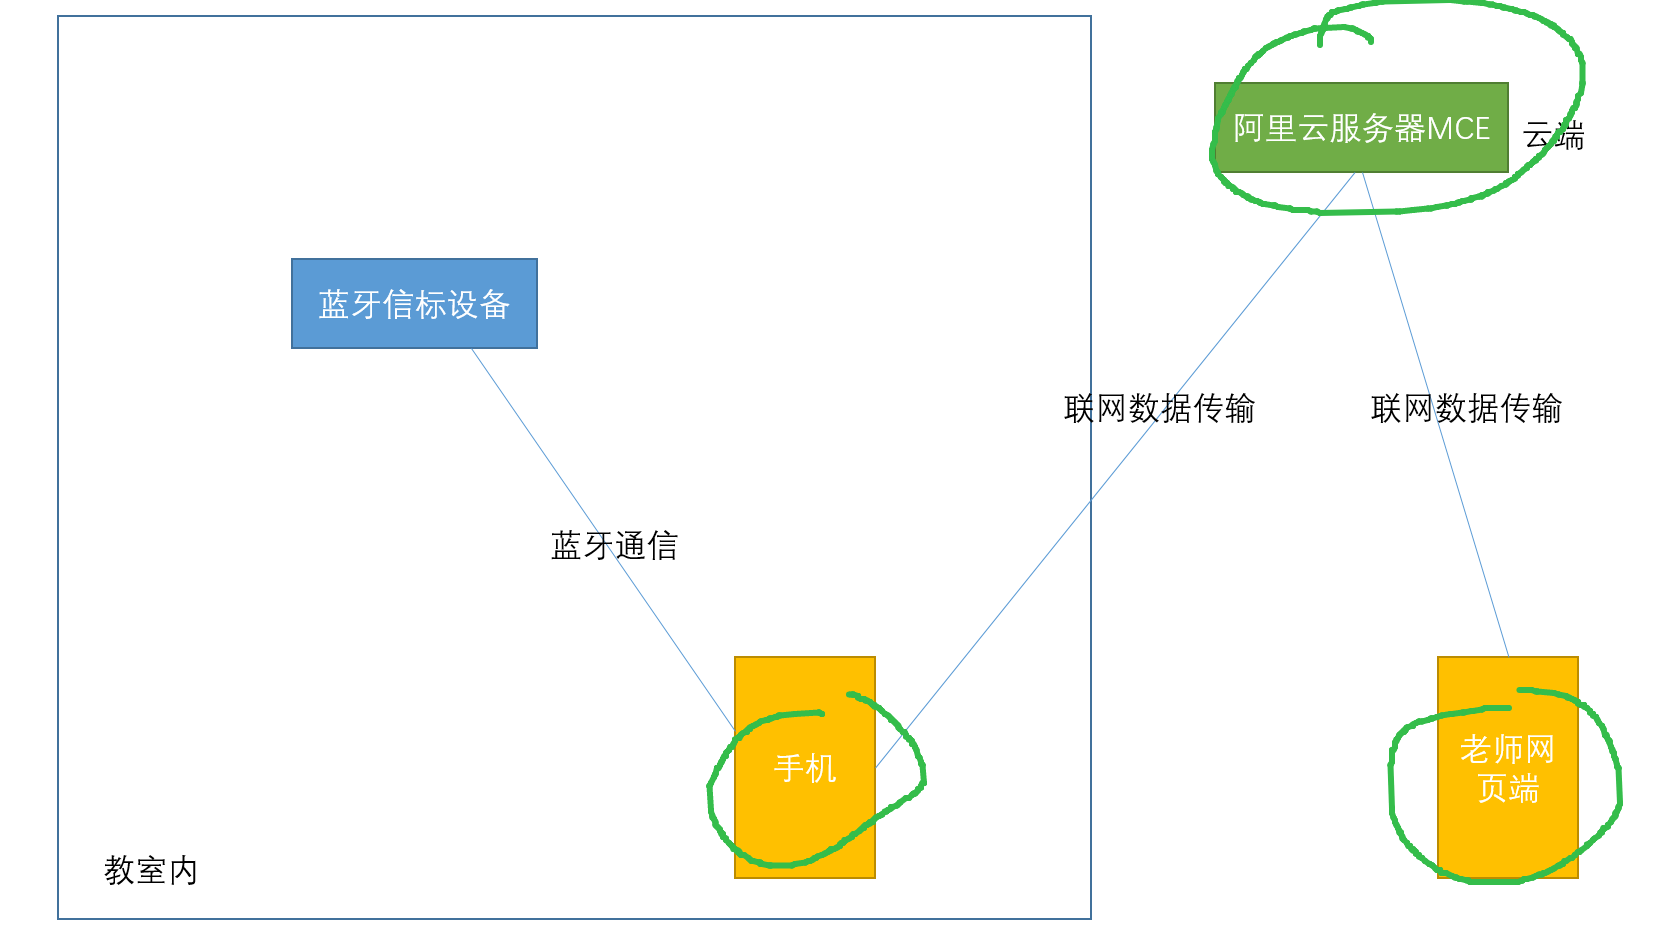
需要开发三部分的程序:
一、android开发
当手机的蓝牙开启并靠近ibeacon设备时,设备会主动发送蓝牙信号。
手机接收到这个信号后,根据ibeacon设备的UUID、major、minor和MAC这四个参数,就可以确认是哪一台ibeacon设备。然后,手机调用服务器上的考勤接口(注意:ibeacon设备只用于确认手机在考勤机附近,不会发送考勤数据到设备本身),这样就可以实现蓝牙考勤了。
android-beacon-library:
https://altbeacon.github.io/android-beacon-library/
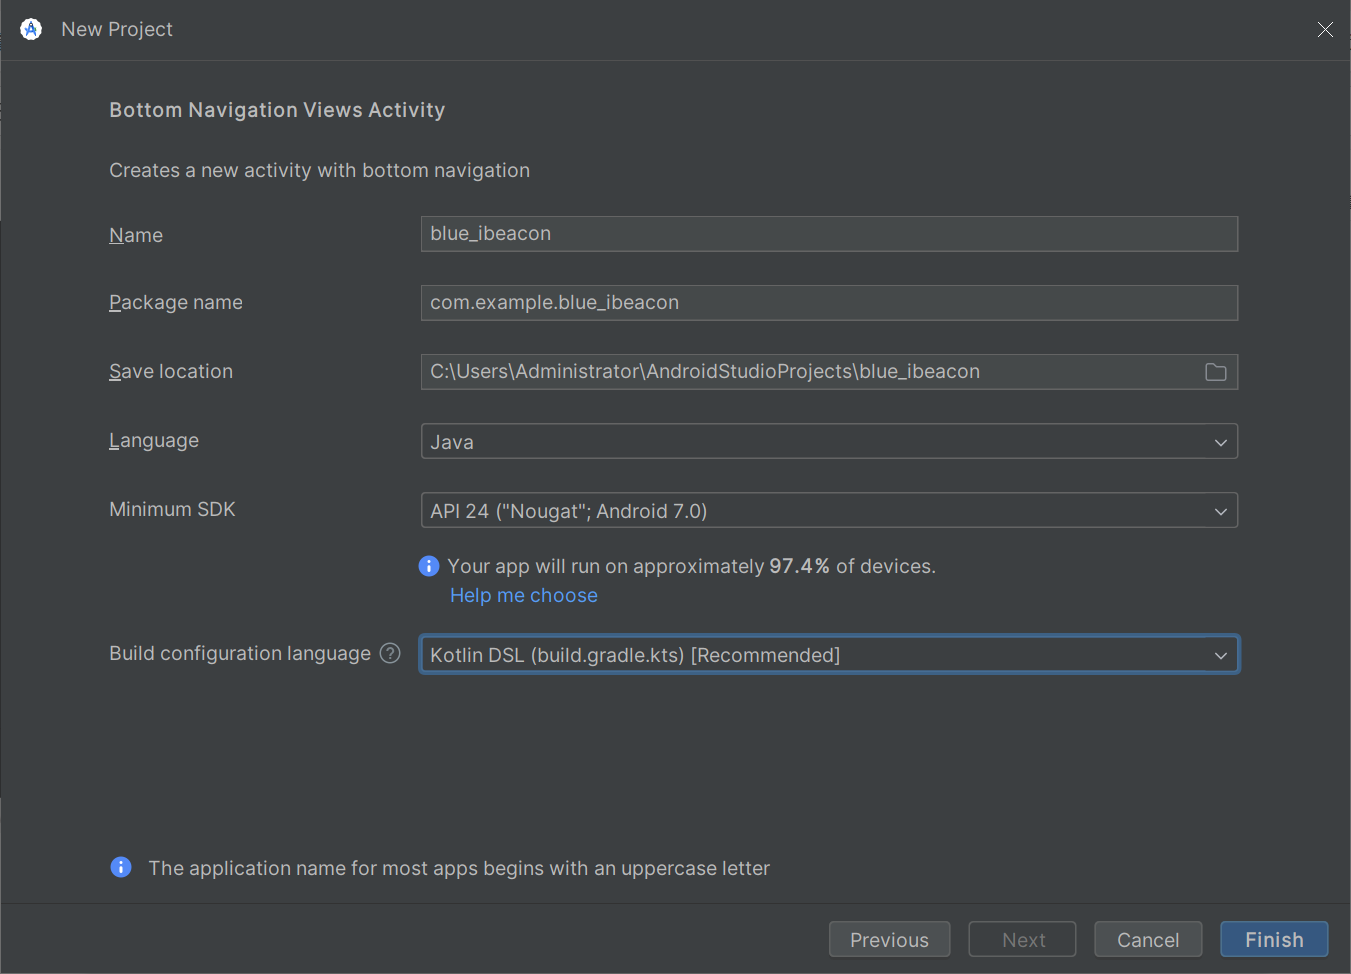
android stdio
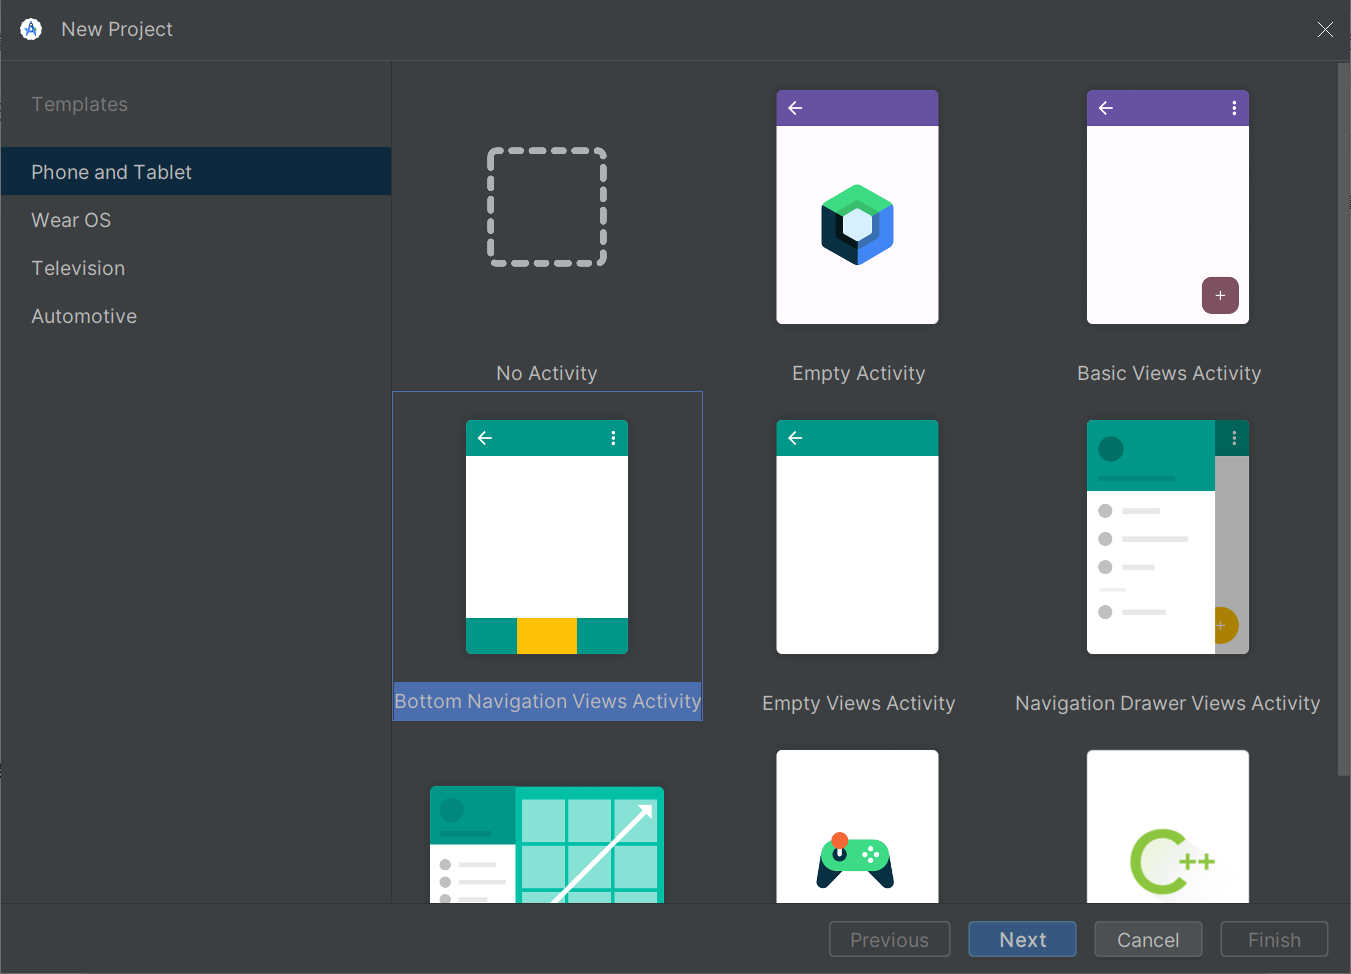
考虑和大众android手机的版本,选低一点的:
在AndroidManifest.xml文件中添加蓝牙、定位以及文件读取和写入权限的静态权限,可以按照以下格式进行:
xml展开代码 <?xml version="1.0" encoding="utf-8"?>
<manifest xmlns:android="http://schemas.android.com/apk/res/android"
    xmlns:tools="http://schemas.android.com/tools">
    <!-- Android 12以下才需要定位权限, Android 9以下官方建议申请ACCESS_COARSE_LOCATION -->
    <uses-permission android:name="android.permission.ACCESS_COARSE_LOCATION" />
    <uses-permission android:name="android.permission.ACCESS_FINE_LOCATION" />
    <uses-permission android:name="android.permission.BLUETOOTH" />
    <uses-permission android:name="android.permission.BLUETOOTH_ADMIN" />
    <!-- Android 12在不申请定位权限时,必须加上android:usesPermissionFlags="neverForLocation",否则搜不到设备 -->
    <uses-permission
        android:name="android.permission.BLUETOOTH_SCAN"
        android:usesPermissionFlags="neverForLocation"
        tools:targetApi="s" />
    <uses-permission android:name="android.permission.BLUETOOTH_ADVERTISE" />
    <uses-permission android:name="android.permission.BLUETOOTH_CONNECT" />
    <uses-permission android:name="android.permission.INTERNET" />
    <application
        android:allowBackup="true"
        android:dataExtractionRules="@xml/data_extraction_rules"
        android:fullBackupContent="@xml/backup_rules"
        android:icon="@mipmap/ic_launcher"
        android:label="@string/app_name"
        android:roundIcon="@mipmap/ic_launcher_round"
        android:supportsRtl="true"
        android:theme="@style/Theme.MyApplication"
        android:usesCleartextTraffic="true"
        tools:targetApi="31">
        <activity
            android:name=".MainActivity"
            android:exported="true">
            <intent-filter>
                <action android:name="android.intent.action.MAIN" />
                <category android:name="android.intent.category.LAUNCHER" />
            </intent-filter>
        </activity>
    </application>
</manifest>
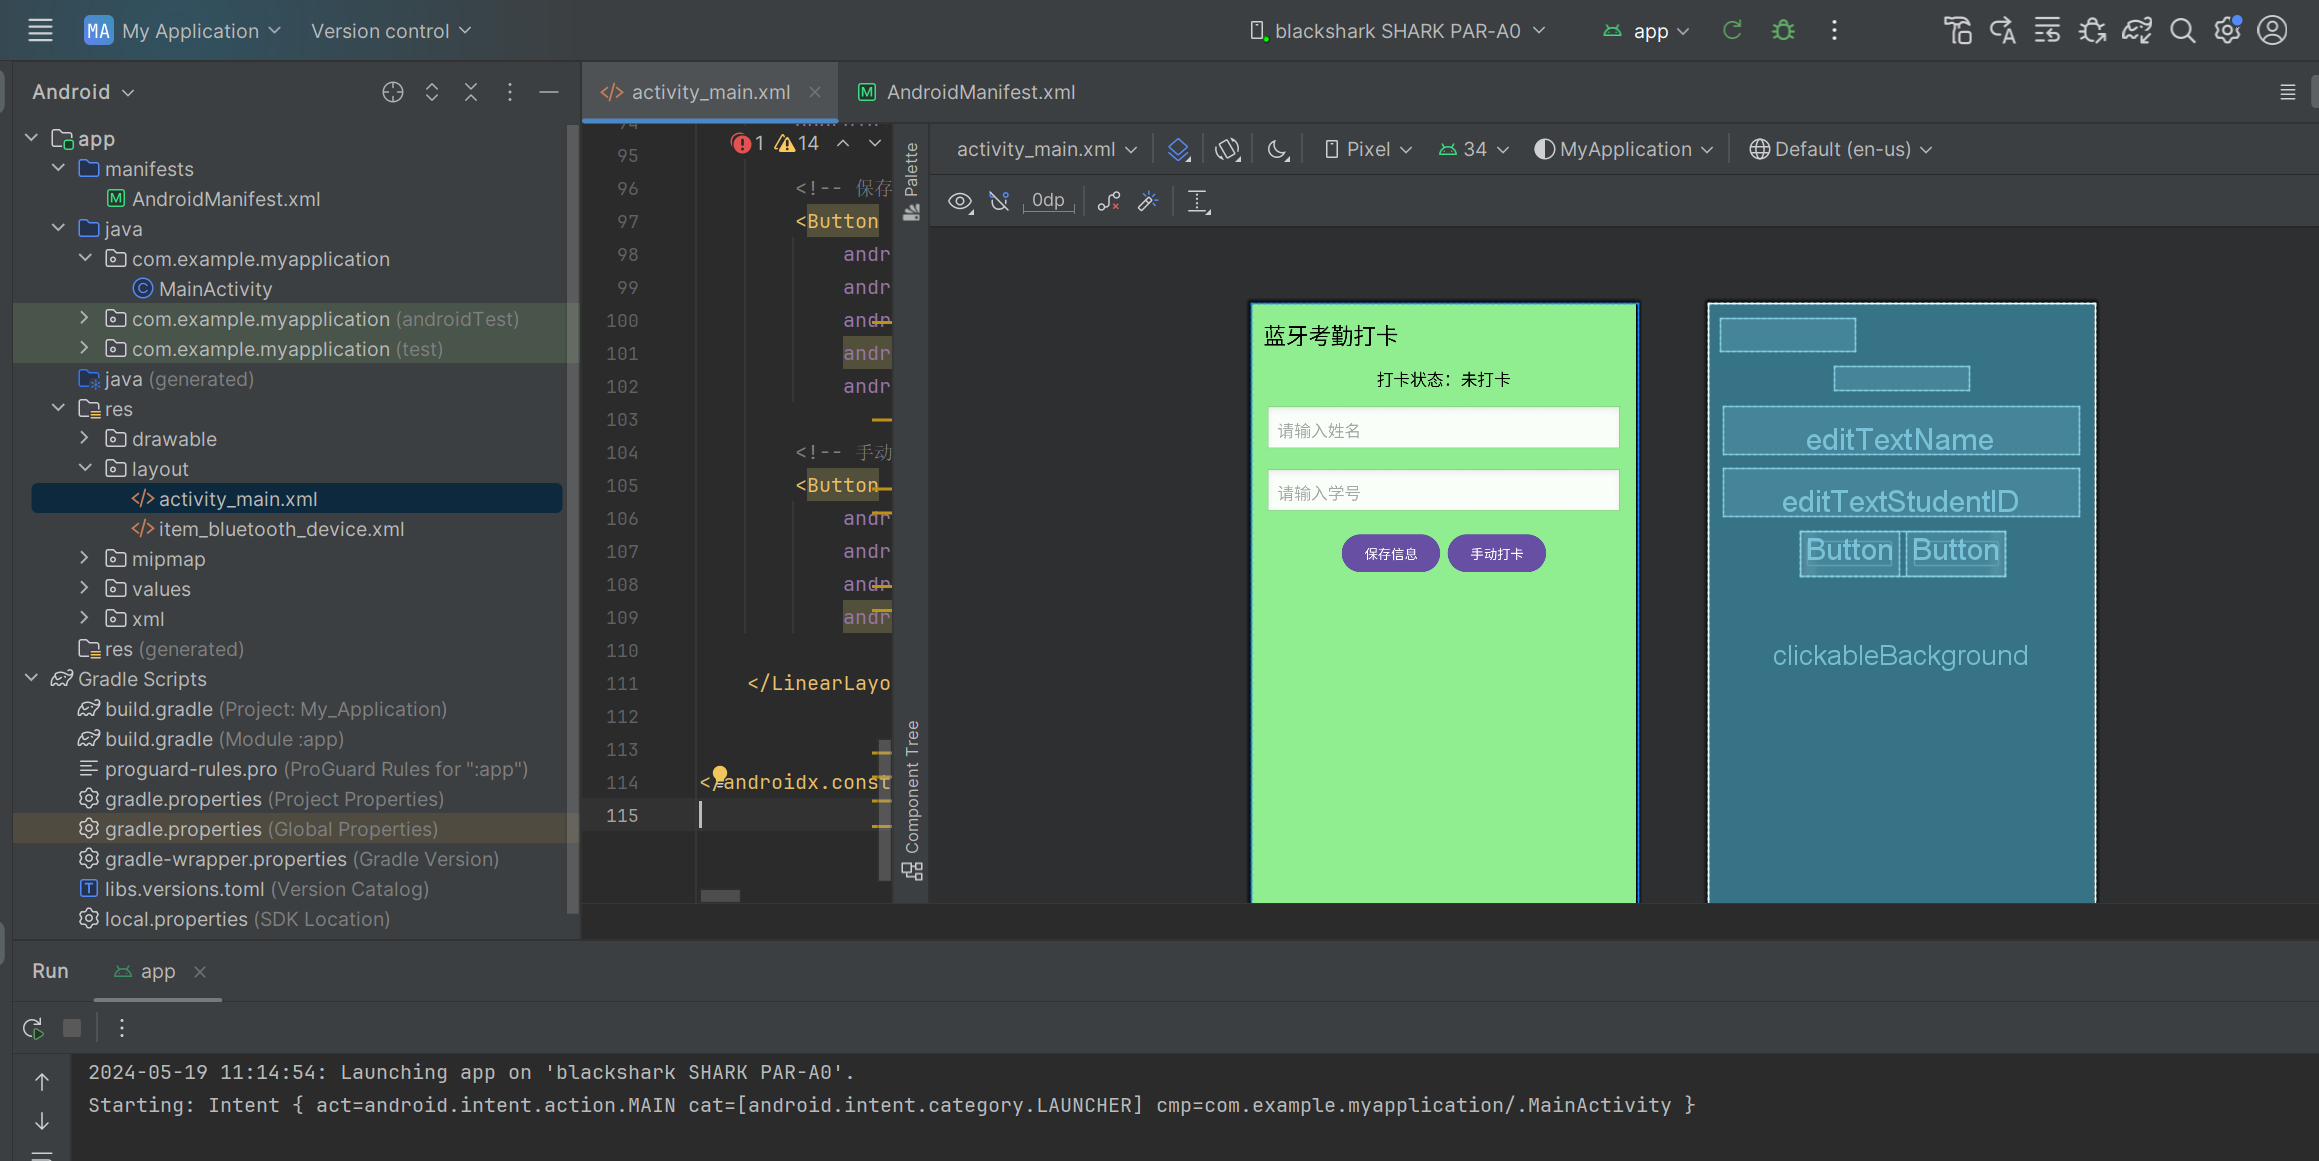
设计界面:
二、服务器接口与gradio开发
fastapi接口:
cpp展开代码@app.post("/check_in")
def check_in_student(student: Student):
    conn = connect_to_database('dakax.db')
    result = check_in(conn, student.name, student.student_id)
    close_connection(conn)
    ret = {"status": "success", "message": "学生签到成功"} if result else {"status": "error", "message": "请联系老师添加学生信息"}
    return ret
@app.post("/delete_student_record")
def delete_student_record(student: Student):
    try:
        conn = connect_to_database('dakax.db')
        delete_record(conn, student.name, student.student_id)
        close_connection(conn)
    except:
        return {"status": "error", "message": "学生记录删除失败"}
    return {"status": "success", "message": "学生记录删除成功"}
@app.post("/insert_student_record")
def insert_student_record(student: Student):
    try:
        conn = connect_to_database('dakax.db')
        ret = insert_record(conn, student.name, student.student_id)
        close_connection(conn)
        if ret:
            return {"status": "success", "message": "学生记录新增成功"}
        else:
            return {"status": "error", "message": "学生记录已存在,无法新增"}
    except:
        return {"status": "error", "message": "学生记录新增失败"}
gradio:
cpp展开代码def create_gradio():
with gr.Blocks() as demo:
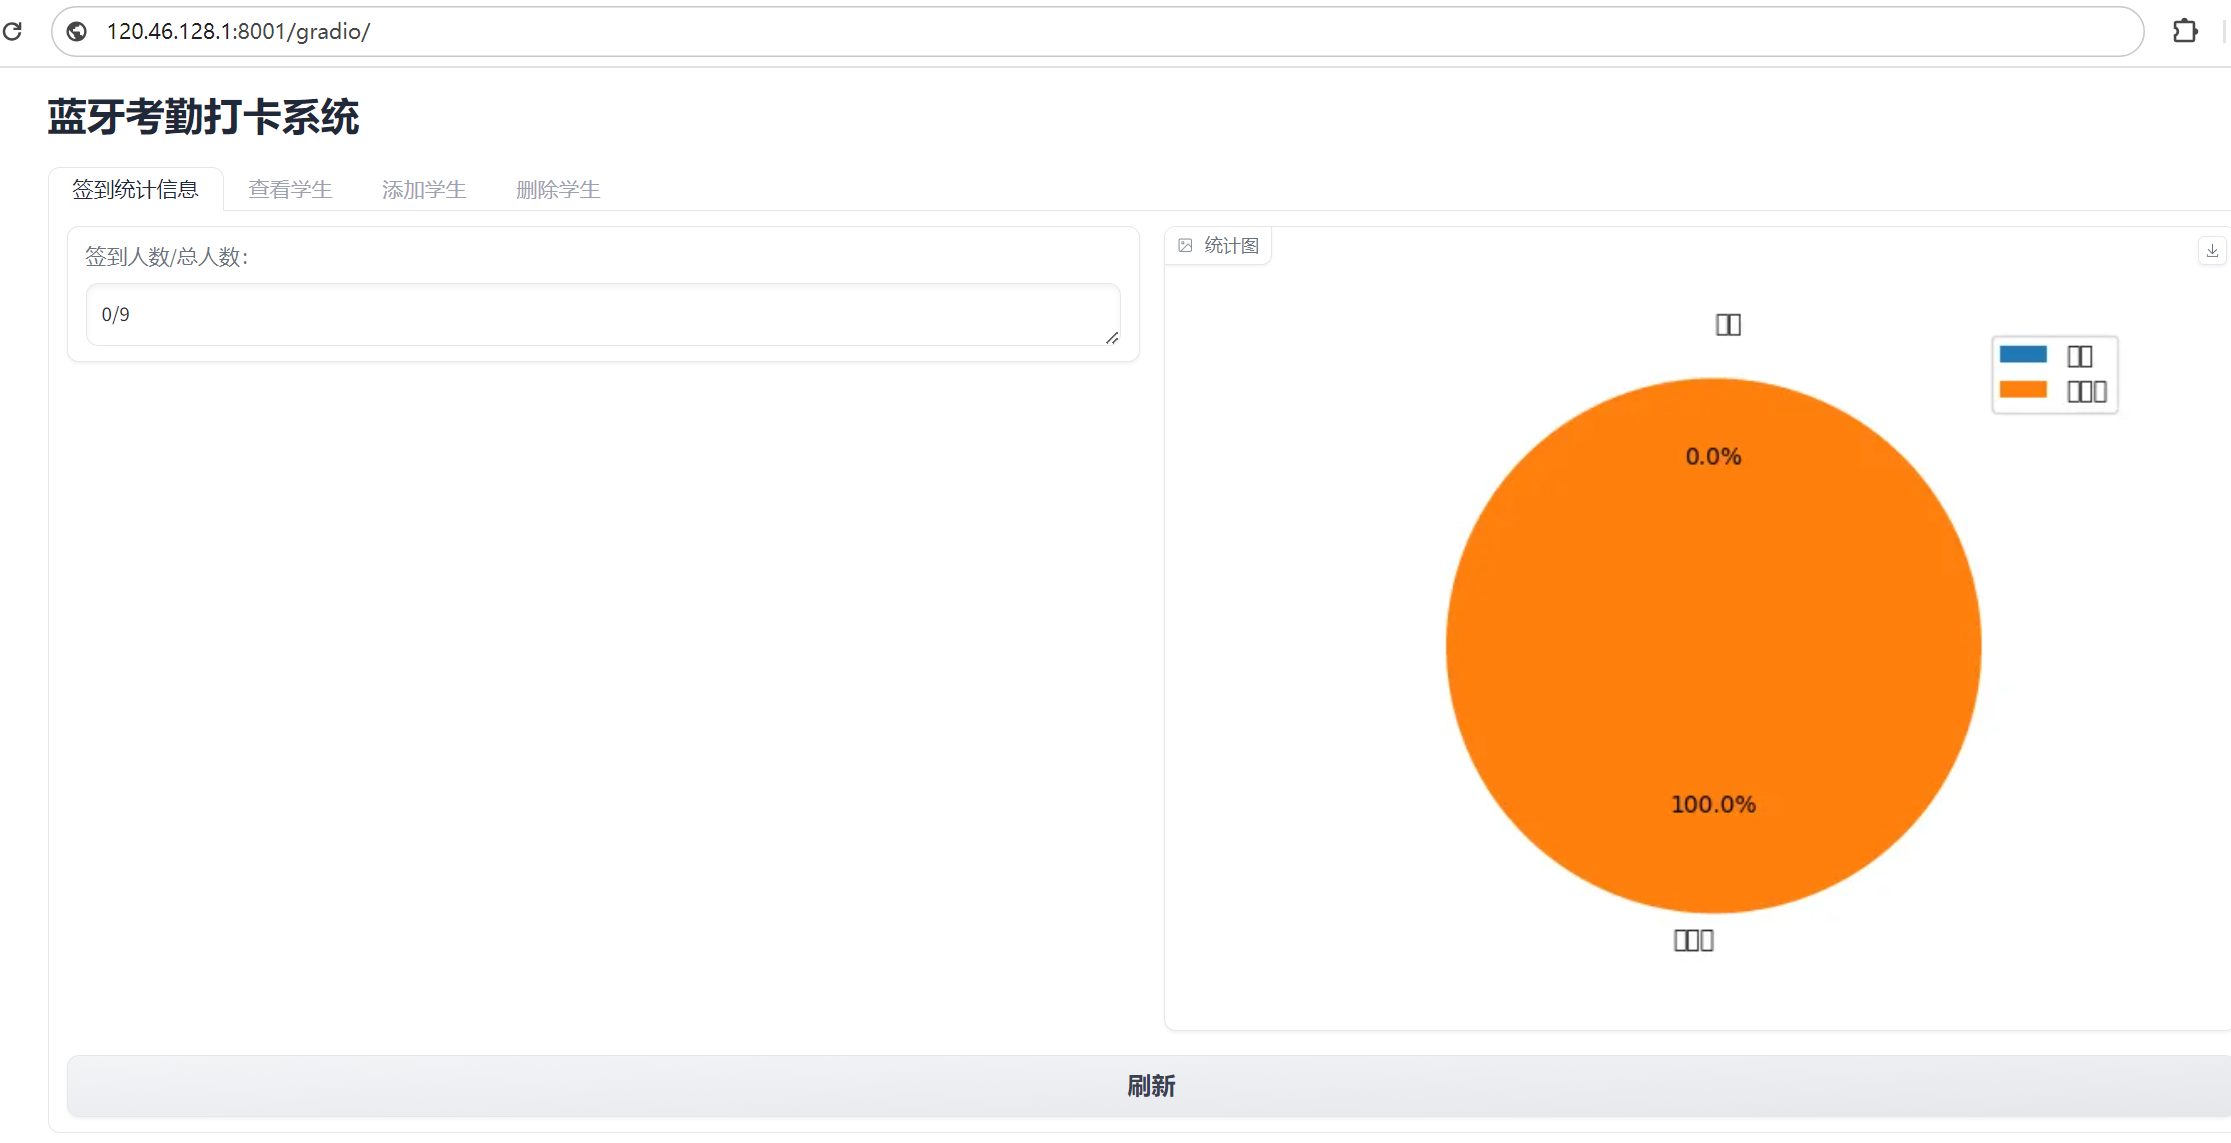
gr.Markdown("# 蓝牙考勤打卡系统")
with gr.Tab("签到统计信息"):
with gr.Row():
o1, o2 = checkin_data()
with gr.Column():
output_txt = gr.Textbox(label="签到人数/总人数:", value=o1)
with gr.Column():
output_pil_img = gr.Image(label="统计图", type="pil", value=o2)
with gr.Row():
checkin_button = gr.Button("刷新")
checkin_button.click(checkin_data, [], [output_txt, output_pil_img])
with gr.Tab("查看学生"):
with gr.Row():
with gr.Column():
# gr.DataFrame
output = gr.DataFrame(label="全部学生信息", value=update_data())
update_button = gr.Button("刷新")
update_button.click(update_data, [], output)
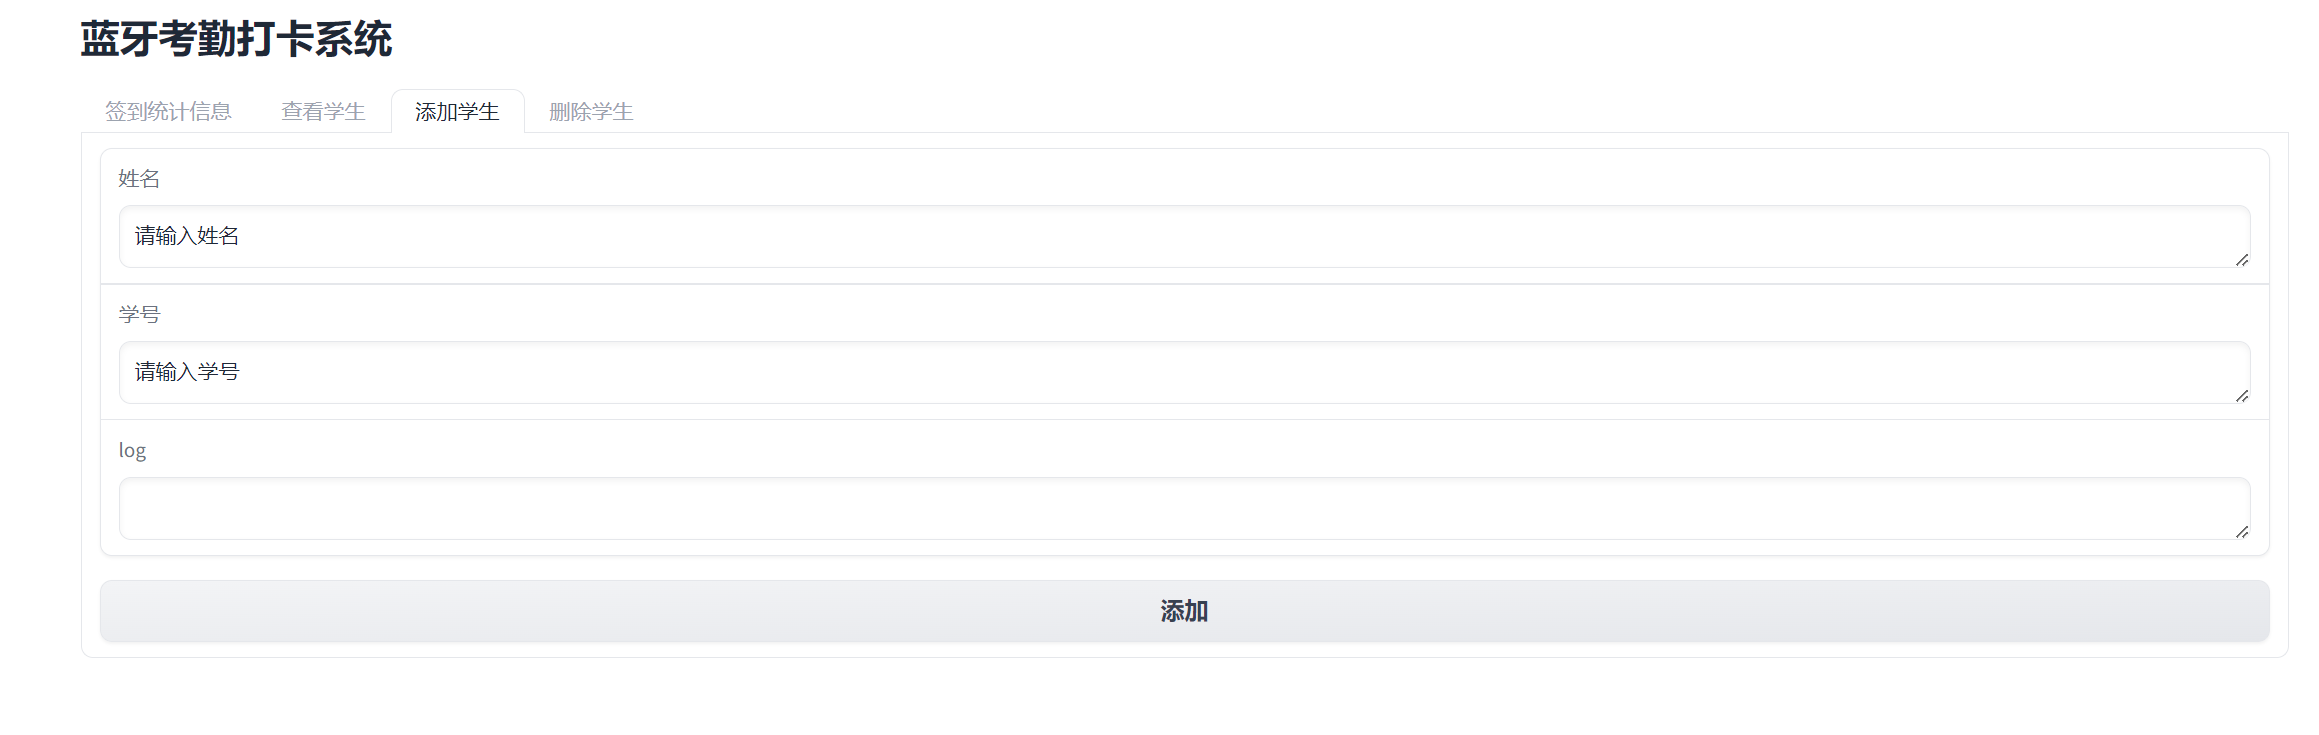
with gr.Tab("添加学生"):
with gr.Row():
with gr.Column():
add_name = gr.Textbox(label="姓名", value="请输入姓名")
add_student_id = gr.Textbox(label="学号", value="请输入学号")
output = gr.Textbox(label="log")
add_button = gr.Button("添加")
add_button.click(add_student, [add_name, add_student_id], output)
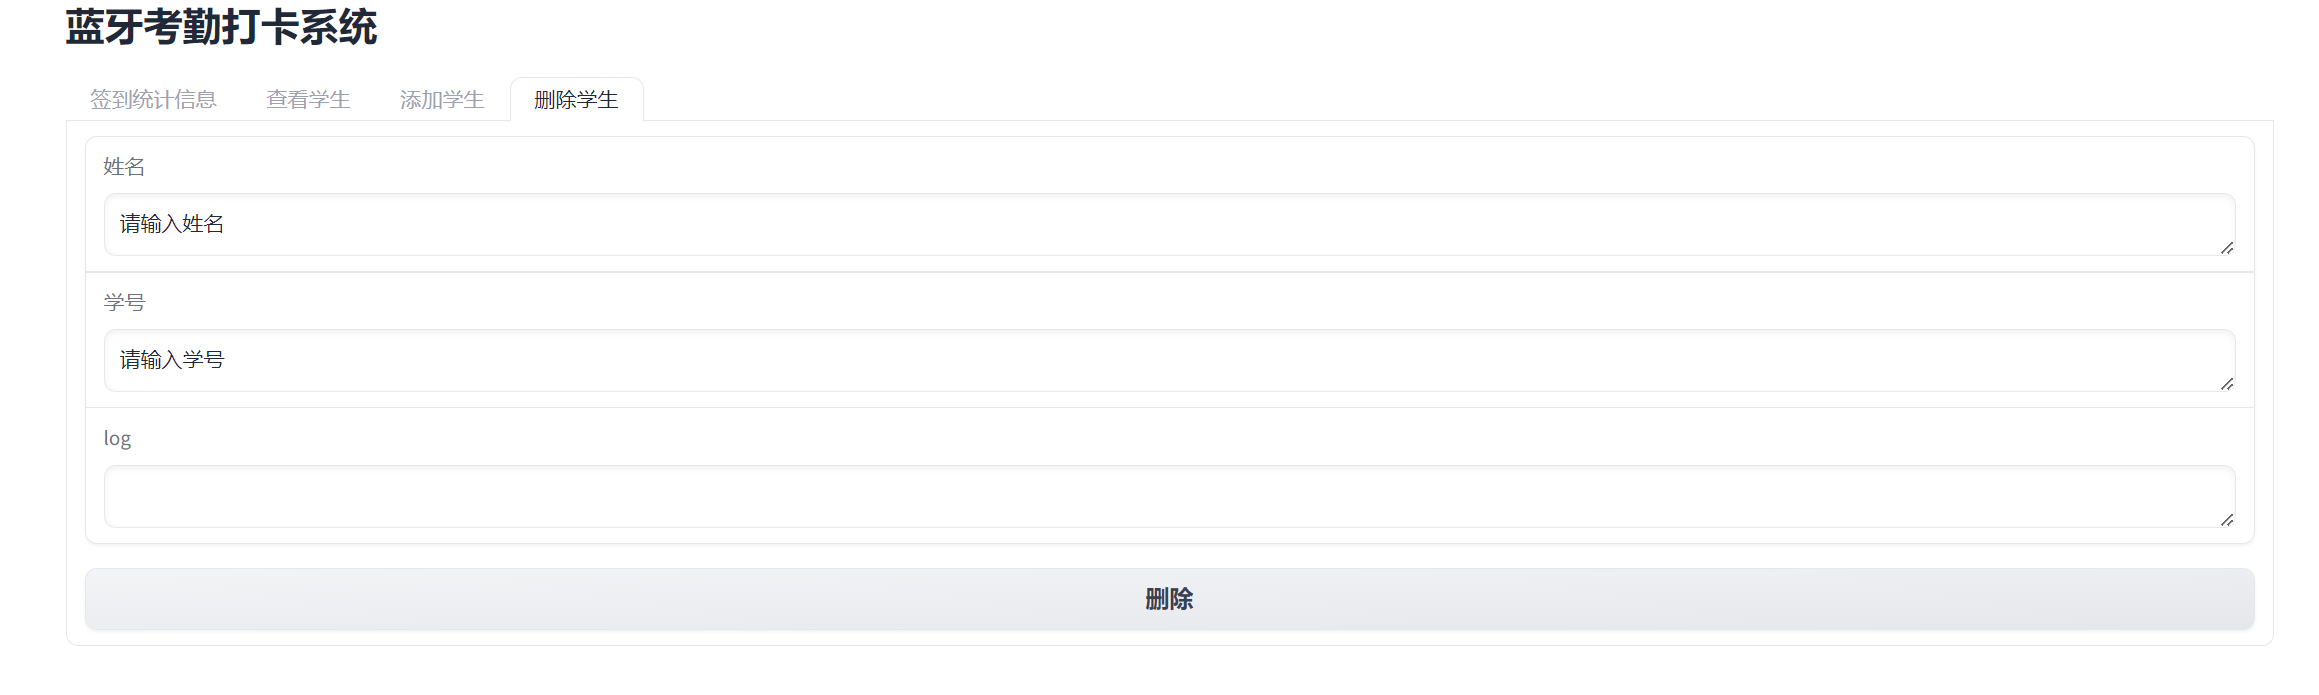
with gr.Tab("删除学生"):
with gr.Row():
with gr.Column():
delete_name = gr.Textbox(label="姓名", value="请输入姓名")
delete_student_id = gr.Textbox(label="学号", value="请输入学号")
output = gr.Textbox(label="log")
delete_button = gr.Button("删除")
delete_button.click(delete_student, [delete_name, delete_student_id], output)
return demo
三、gradio前端界面展示
打开web graio界面就可以操作:

问询、帮助
你如果需要帮助,请看这里:
cpp展开代码https://docs.qq.com/sheet/DUEdqZ2lmbmR6UVdU?tab=BB08J2
如果对你有用的话,可以打赏哦
打赏


本文作者:Dong
本文链接:
版权声明:本博客所有文章除特别声明外,均采用 CC BY-NC。本作品采用《知识共享署名-非商业性使用 4.0 国际许可协议》进行许可。您可以在非商业用途下自由转载和修改,但必须注明出处并提供原作者链接。 许可协议。转载请注明出处!
目录